
5 in 1 Project
Continuing in Photoshop, you will create a new realistic person by combining parts from 5 individuals.
Please use the following links to download 5 of your classmates.
Tools needed in Photoshop:
-Polygonal Lasso (selection tool)
-Know your Short Keys will help speed up the process (i.e., Command C [Copy], Command V [Paste], Command + [Zoom in], etc.)
-Transform (changes size & rotation) / Warp Tool
-Eraser (knowledge on how to change the settings for this tool is VITAL!)
-Paint Brush / Airbrush (knowledge on how to change the settings for this tool is VITAL!)
-Knowledge of Layers and how to Flatten.

1. Find 5 people that you would like to use. The base person should be yourself, unless you ask for permission from that person.
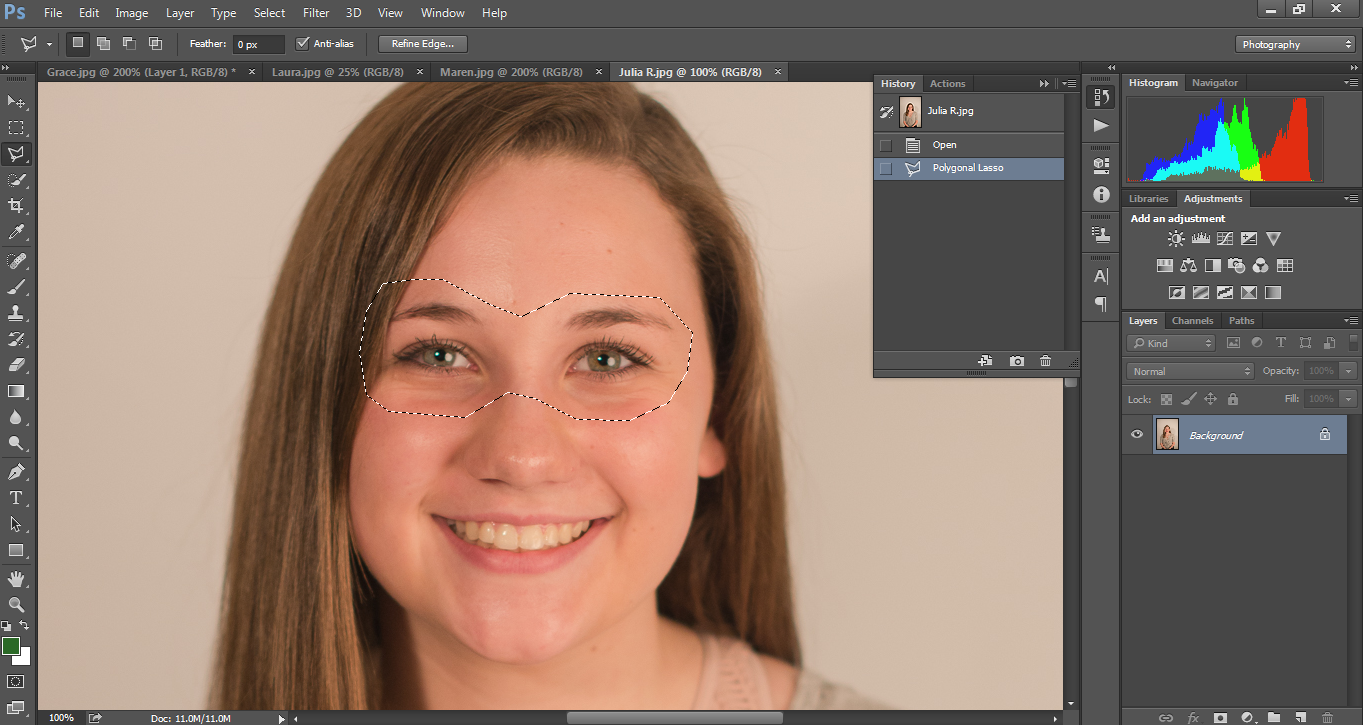
2. Locate the Polygonal Lasso Tool > 3rd tool down on tool bar
3. Figure out which part of the person you would like to use
2. Locate the Polygonal Lasso Tool > 3rd tool down on tool bar
3. Figure out which part of the person you would like to use
|
4. Begin by clicking to start the selection process. Clicking every so often to create a rough outline. You want to get a lot of extra surface area around the part that you would like (This will be very useful later.)
5. Command C to copy the selection. (You will want to go back to the move tool) |
|
|
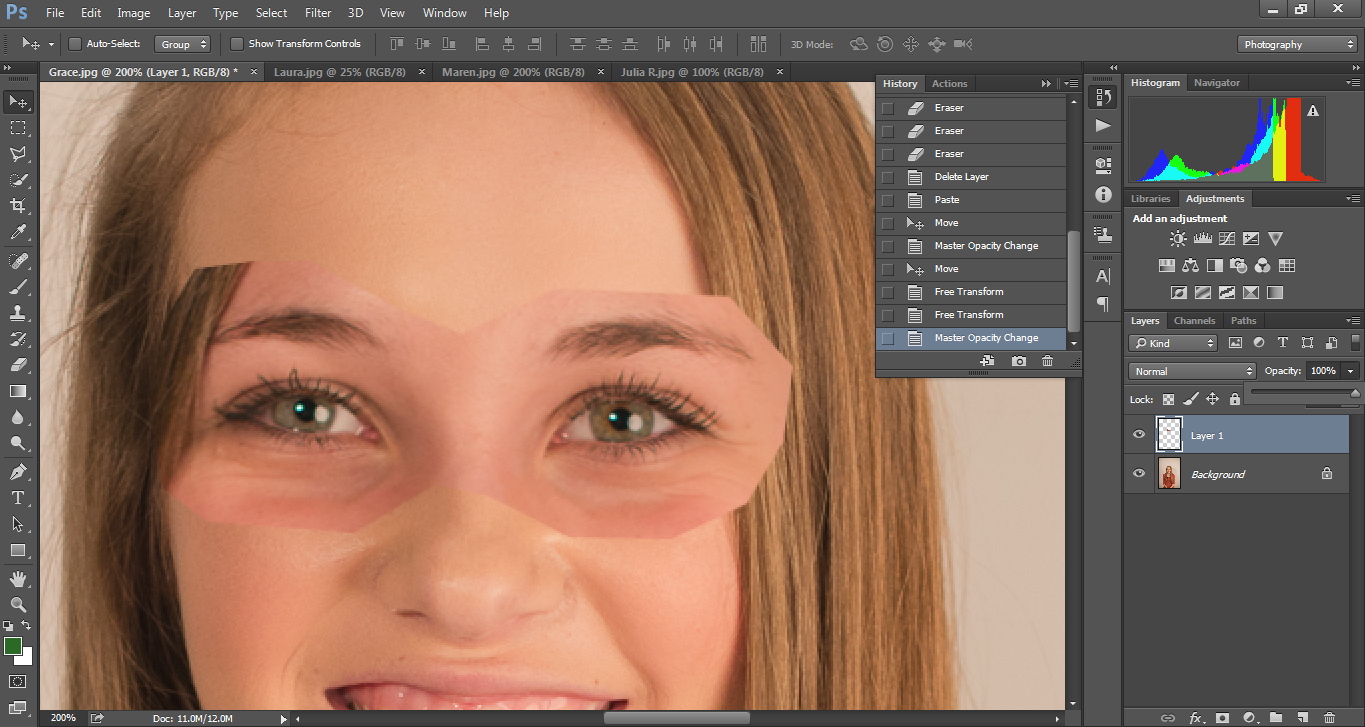
6. Command V to paste selection on your "base" subject. **Note: You have a New Layer! |
|
|
Optional Steps (shown above):
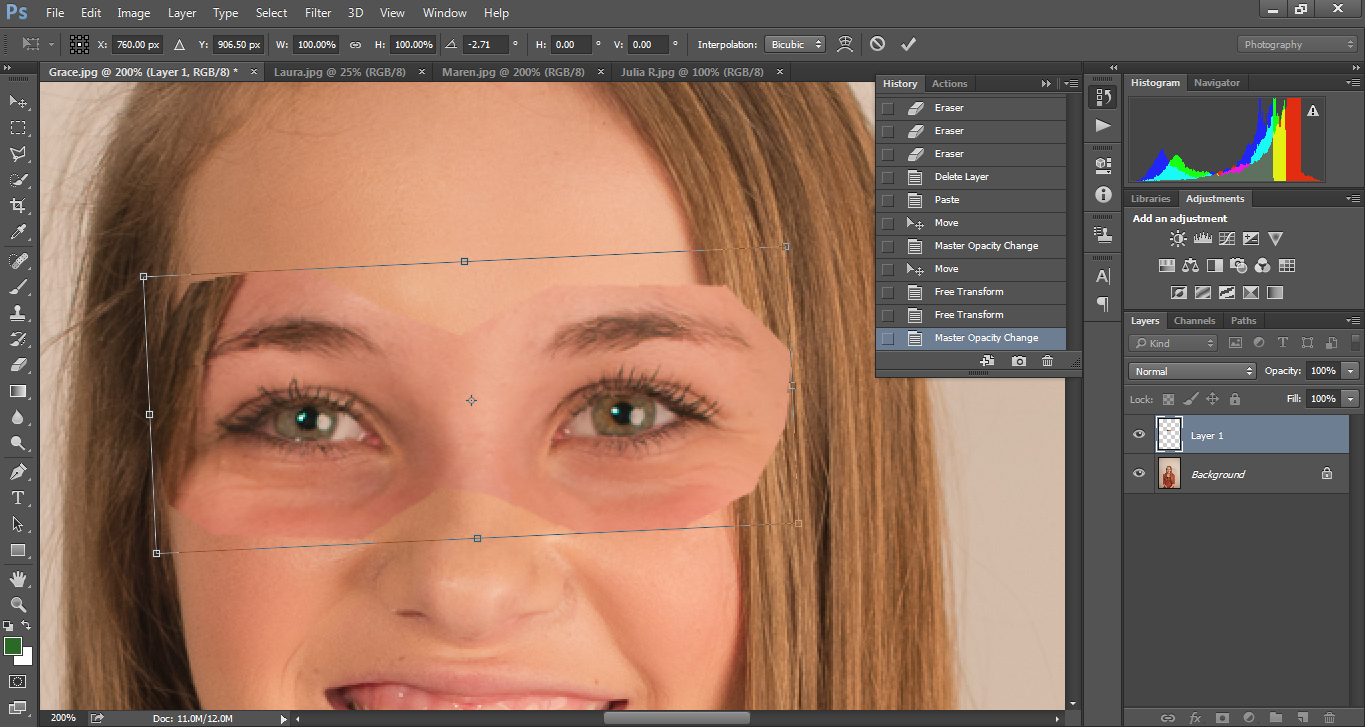
7. Transform (command T). This allows for the object to be made larger or smaller or rotated.
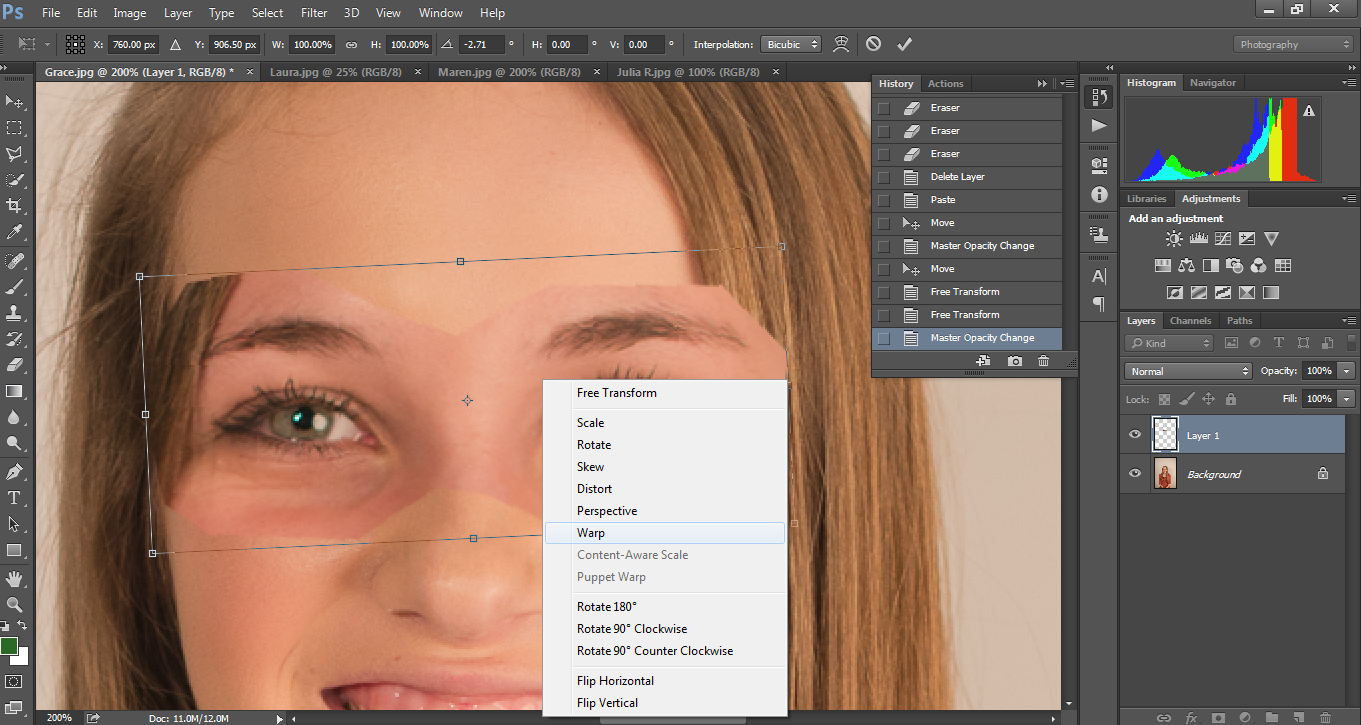
8. Warp (Keep Transform box open, then Ctrl Click [Right Click]
7. Transform (command T). This allows for the object to be made larger or smaller or rotated.
8. Warp (Keep Transform box open, then Ctrl Click [Right Click]
|
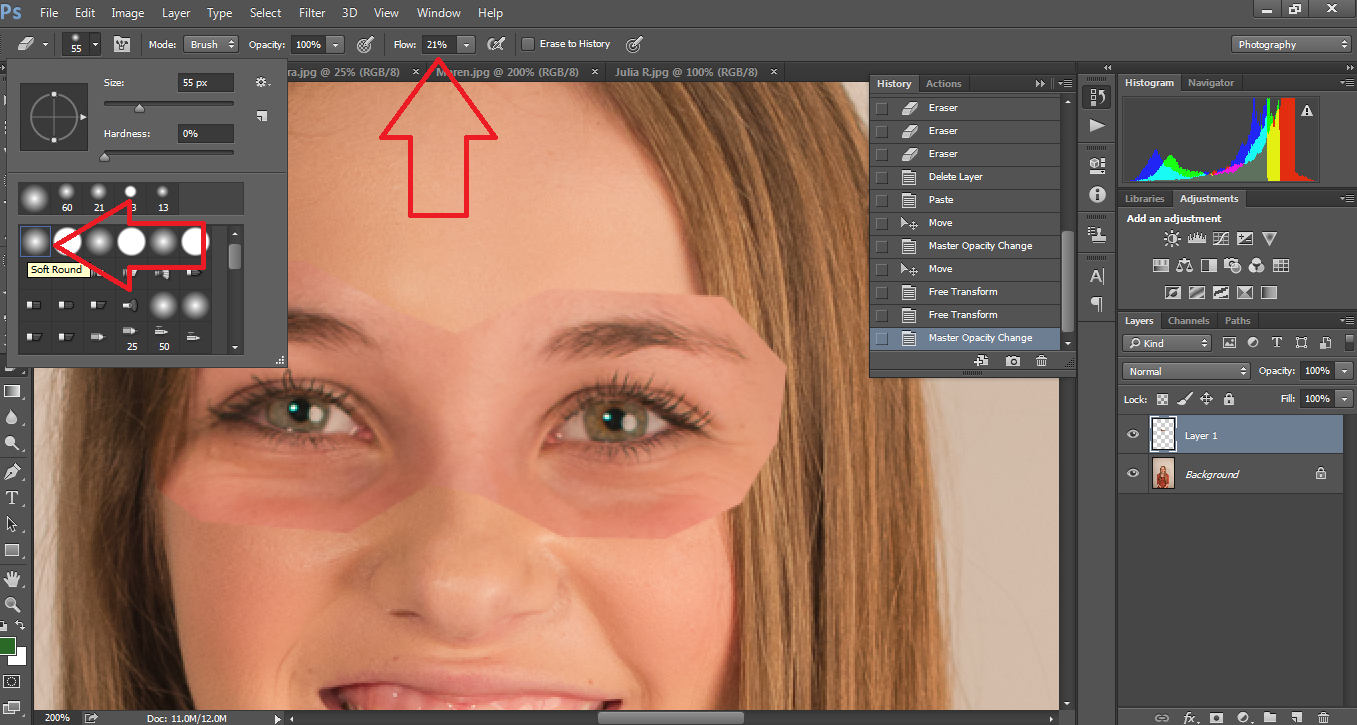
9. Eraser - Change your brush to Soft Round (Hardness 0%) and the flow should be set to around 20%. (Optional: Change opacity to 80%)
>>>> this will allow the blending process to get started and will make matching skin tones much easier! >>>> Focus on erasing the harsh outer line and come in to the area that you only wish to have left. |
|
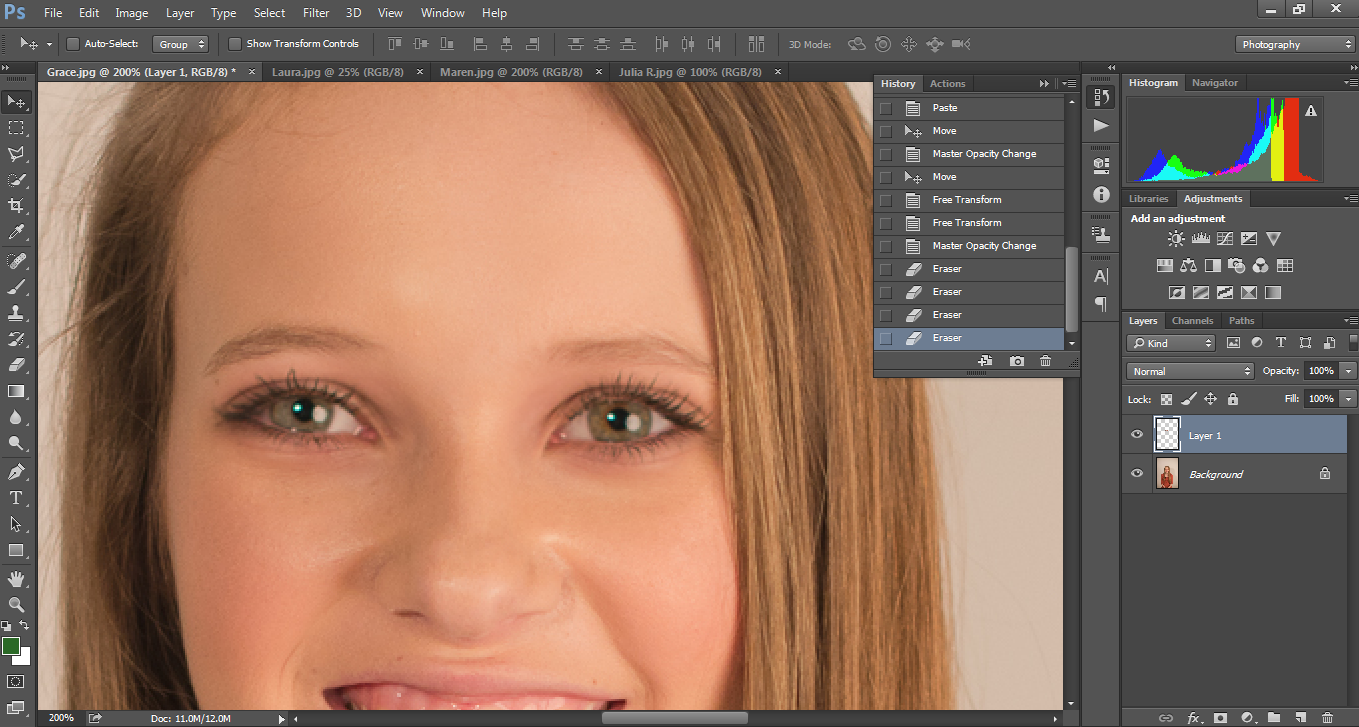
10. Repeat steps 1-9 for 3 more parts of the face. *Focusing on really getting the blending started now on each layer!
|
|
11. Flatten once you are done with perfectly erasing all the harsh edges and feel everything will be easy to match skin tones. (To flatten, go to the layers tab, at the top right of that tab, you will see a small down arrow with 3 small lines. Click on it, this will open a drop down menu. Locate "Flatten Image" >> Towards the bottom.
|
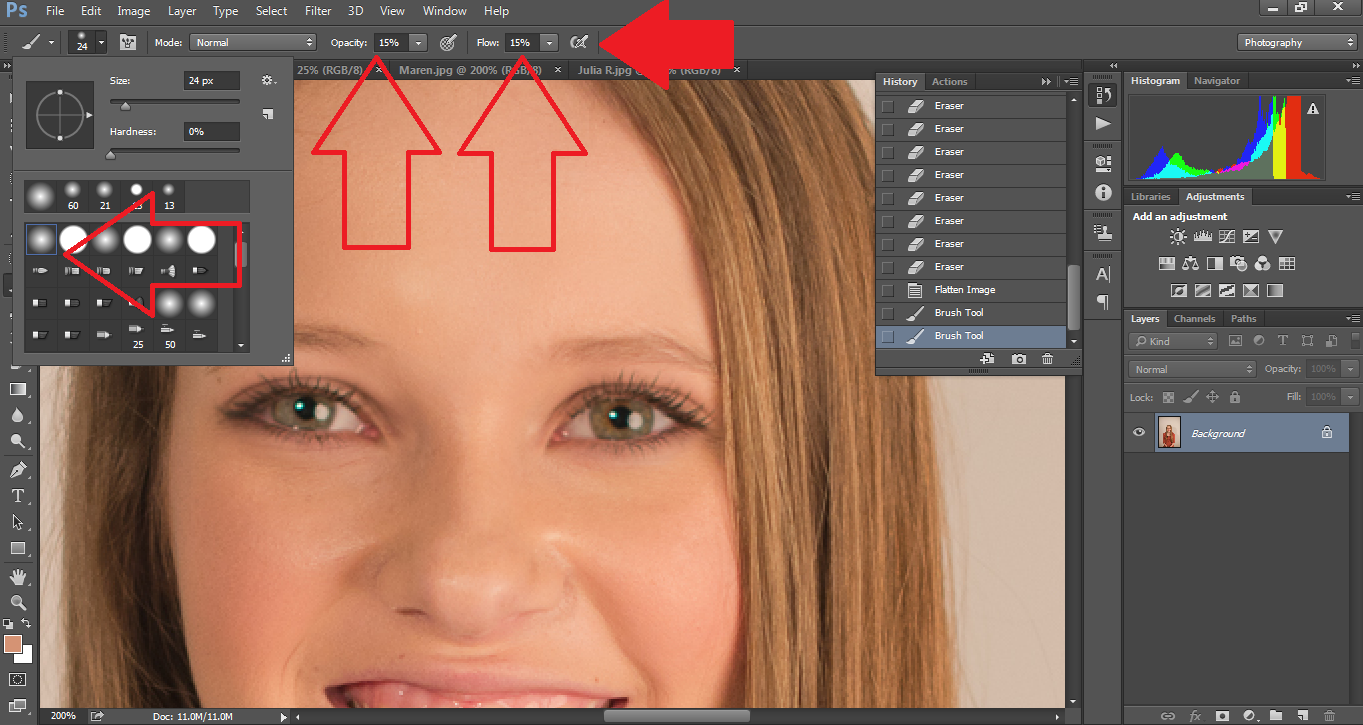
12. Matching Skin Tones: Paint Brush (find the tool on the tool bar that looks just like a paint brush). You will need to adjust the settings to give you as much control as possible.
>>>Soft round brush (Hardness 0%) >>> Change opacity to 15% >>>Change flow to 15% >>>Click the Airbrush tool 12. If you hold option (alt on PC), you will see an eyedropper icon appear as your cursor. While holding Option, click once over the skin tone that you want. (This will change the color of your airbrush). "Paint" the skin tones that you would like to match. Try not to go to heavy, it will make it noticeable. |
|
To Submit, please click the correct link below. Create a new folder titled with your name. Inside the folder, please include your final image along with each person used labeled with the part used (i.e., eyes, mouth, nose, etc.)
